Tuesday, 27 December 2016

Central Alberta QG Shows Talent!

It is so much fun to showcase the talent of quilters across the country. Thank you so much to Wendy Greber of the Central Alberta Quilt Guild, CQA/ACC Co-ordinator, for putting this altogether!


Central Alberta Quilters Guild in Red Deer, Alberta, consists of close to 100 members and meet once per month.  They hold a large annual quilt show and in 2017 it will be number twenty-six. 

This guild actively makes charity quilts and placemats  throughout the year.  Education to members is a priority and courses are regularly held instructed by other qualified guild members, national and international instructors.

Here are some of the quilts that won at 2016 Quilt Show.

  Best in Show and First Large Quilt – Cheryl Whitten


Viewers Choice CQA/ACC ribbon – Terry Rowland


First place Art Quilt – Wendy Greber

Here are other outstanding quilts in the show:

Made by Debbie Hatt


Made by Diane Andrews


By Elaine Cumont


By Elizabeth Hanson


By Francis Cheeke


By Glenna Ramsay


By Jasmine Travers-Charbonneau.


By Shirely Adam


By Shirley Cullum


Thank you Wendy and Central Alberta QG for sharing your talent with us!
If anyone else would like to share what your guild is up to, please email socialmedia@canadianquilter.com.


Saturday, 10 December 2016

Big Bee Quilt Labels & Etiquettes Grosse corvée de courtepointe 2017


To quilt label or no quilt label?  Well, that’s not the question today!
Today we are giving you a label to use for the wonderful 
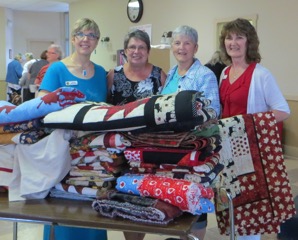
quilts you are making for the Big Quilt Bee 2017.  We have this in a few different formats so that you can choose the one(s) you want to use:


  • An image (jpeg) that you can import into an image program like Adobe Photoshop Elements (purchased) or Inkscape (free)  to add your information or edit (these appear above for you to download and use – Right-click on the image you want and a menu should pop up.  Click on ‘Save image as’ or ‘Copy image’ to save it to your computer).


 Let's review the process of printing the quilt labels on inkjet printers (see further down the page about printing services if you prefer not to print them at home). 

Inkjet printers spray the ink on to the fabric, so the trick is to have the fabric absorb the ink and retain it, wash after wash.  One of the first products to help with that is still available is Bubble Jet Set 2000.  After soaking cotton or silk in this solution, then drying it, you press an 8½" x 11" sheet of freezer paper to the back of the fabric.  Trim the sheet and it’s ready to run through your printer.  You need to know which side of the paper your printer prints on (usually the underside of the page in the printer).

 If you are not keen to make your own paper-backed sheets as described above, there are several companies who sell fabric sheets that have been pretreated to help with ink absorption then backed with a paper or plastic to hold the fabric taut during the printing process.  Your quilt shop will have at least one of these in stock.

Each of these products has explicit directions about printing and dealing with the fabric sheets once they come out of the printer.

The sheets of quilt labels are saved as Adobe Acrobat files (pdf), and once you download them to your computer, you can open them in Acrobat Reader and print them out.  Deal with the labels according to the directions for the fabric sheets you are using and then you can use a fabric pen or permanent marker (or crayon) to fill in your name, the date and the location your quilt is coming from (this could be just the province or the village/town/city and region).  It’s usually a good idea to ‘heat set’ the label with a hot iron to set the colour permanently.

Label Option 2:  Downloading one of the Two Images at the top of this Page and Personalizing Them
You may have photo software such as Adobe Photoshop Essentials and so you know how to add text to one of the jpeg quilt labels. If you don’t, you may be interested in trying Inkscape, www.inkscape.org/ which is free software for working with images.  Download the quilt label image (quilt_label_text.jpg) and save it on your computer.  When you open Inkscape (or any other photo software), you have a blank page to work with. 


Go to File -> Open and double-click on the name of the file to import it into Inkscape.  The image will fill the screen, so you will have to resize it.  You may have to change the Document Properties (under the File menu) to set the paper size to 11" x 8½" and the units to inches.  After setting the properties up, you can click on the image to see the image handles and then change the size to a width of 3.5” and height of 3.25”.

Changing the Label

You may not want to use the text the way it is set up on the sample label.  You are free to use the ‘eraser’ tool to delete the text that does not suit you and then type in your own text.

Adding text to the quilt label

In Inkscape, click the ‘A’ on the left hand menu and click beside ‘Made by:’.  Under the top menu, you’ll see ‘sans-serif’ and 32 – those drop-down menus offer all the different fonts and sizes.  For most regular fonts, size 16 will fit this size label.


It doesn’t make sense to print only one quilt label on a fabric sheet, so your options are to print out your label and 3 other blank ones for your friends...or to copy the label and fill in the information for them and then print the sheet!
Copying the quilt label
When printing on a fabric sheet, you can fit 4 labels or 1 ‘bee’ label and other labels for yourself.  It makes sense to make use of the whole fabric sheet.  Here are the directions for copying the image and creating a sheet of 4 labels:
  • From the ‘Edit’ menu, choose ‘Select All in All Layers’, then from the ‘Object’ menu, choose ‘Group’. 
  • After those choices, click on the label and from the ‘Edit’ menu, choose ‘Copy’, then go back to the same menu and choose ‘Paste’. 
  • Click on the image and move the duplicate copy to the other side of the page.  Choose ‘Paste’, twice more so that you’ll have 4 labels spaced on the page.
  • Click on the ‘A’, then highlight any text (like the name) you wish to change and type the new information.
  • Save the file and then print it according to the directions of the fabric sheets you have.

Using a Printing Service
You may have a local Tshirt or Embroidery store near you that will print images for you.  Usually you prepare the images according to their directions and bring them in a copy on a flash drive.  At my local store, I can bring in a sheet of 4 labels and have them printed on a polyester fabric sheet.

On the Internet, in Canada, there are a few options for printing on fabric:
https://designyourfabric.com

The last two print companies will print on quilting cotton.  You can send them one image and they will print anything from a swatch sample to yards - filled with labels.  These are excellent options if you are working with a large group and need a lot of blank labels that can be filled in later on.

 Label Option 3:  Downloading one of the Two Images at the top of this Page then using them in a Word Processor
After downloading the images, you may choose to 'insert' or 'import' them into a word processing program (like Microsoft Word) and then you can resize the image to suit your page.  If you want to print more than one label on a fabric sheet, 'Copy' and 'Paste' your image and move them on the page until you have all of them organized.  Don't forget to save your page before printing!

NOTE:  If all else fails, and there’s no-one available to make up labels for you, email me at lpmacdonald@hotmail.com and I’ll create a page of labels to your specifications.  I’ll email it back to you and you can print them out or send them out to be printed.


Saturday, 3 December 2016

Fibre Art Network

What IS the FIBRE ART NETWORK?


 (about the guest blogger: Jenny Perry is a Canadian/American fibre artist who has lived most of her life in Kentucky, and currently divides her time between Lac Le Jeune BC and Asheville NC. She is the website coordinator for the Fibre Art Network.)

Members of the Canadian Quilters' Association (CQA/ACC) who have attended Quilt Canada have probably noticed that each year there are special exhibits in addition to the National Juried Show. For a number of years now, the Fibre Art Network has had the honour of being invited as one of the special exhibitors and each year many Quilt Canada attendees look forward to seeing the latest work from its members.

The Fibre Art Network is an organization of professional fibre artists from western Canada. Membership is limited to the western provinces of BC, Alberta, Saskatchewan, Manitoba, as well as Yukon and Northwest Territories. The group first formed about fifteen years ago when a small number of fibre artists sought to network and share their experiences and opportunities as artists with others who self-defined themselves as professional fibre artists. Although the group is predominantly art quilters, it welcomes weavers, knitters, felters, and others who create their art with fibre.

The Fibre Art Network regularly organizes exhibits which travel for a period of two to three years. Every effort is made by FAN members to procure venues for each exhibit and for many years now, Quilt Canada has been one of those venues. Exhibits shown have included:


In addition to the FAN special exhibits at Quilt Canada, individual members of FAN are always well represented in the National Juried Show. In addition, the Fibre Art Network annually sponsors an award at the National Juried Show—the Excellence in Innovation Award.

In 2017, there will be two FAN exhibits available to travel: Ekphrastic and Botanical Reflections. If you’re aware of a gallery in your area that would like interested in exhibiting the work of this talented group, please contact FAN’s Venue Coordinator, Carol Seeley (seeleycarol@gmail.com) for additional information. Here’s a sneak peek:

 Beauty Persists: Foxglove in the Fall by Judy Leslie, from FAN’s Botanical Reflections Exhibit


Time is Called by Sara Judith (detail), from FAN’s Ekphrastic Exhibit


For more information about the Fibre Art Network, to view the galleries of our individual members, as well as all FAN’s past exhibits, please visit fibreartnetwork.com.

Thursday, 10 November 2016

Orillia Quilters' Guild Rocks the Quilts!

We have an awesome guest blogger today!  Leslie has written about her super guild.  Read on to be inspired!

The Orillia Quilters’ Guild, comprised of 100 members and a hard-working, dedicated Executive, meets monthly (except July) at Branch 34 of the Royal Canadian Legion in a room overlooking the sparkling waters of Lake Couchiching. It’s a view once gazed upon by explorer Samuel de Champlain whose statue continues to do so from the adjacent Couchiching Park.


Gordon Lightfoot, Canada’s “National Treasure”, was born and raised here in Orillia, Ontario and to the delight of fans, still makes appearances now and then. On a crisp fall day in 2015 he was welcomed by a crowd assembled at Barnfield Point on the Gordon Lightfoot Trail for the unveiling of a large bronze “Golden Leaves” tribute monument in his honour.


Orillia is also where satirist Stephen Leacock’s summer home (a National Monument) and boathouse stand on the shores of Brewery Bay. Leacock’s famous book, “Sunshine Sketches of a Little Town”, featured characters from early Orillia (aka Mariposa) in thin disquise. Even today a drive through Orillia’s main streets reveals business signs with “Mariposa” or “Sunshine” or “Leacock” in their names.


Incorporated in 2005, we are a busy guild whose members have individually and collectively made and donated hundreds of quilts, placemats, and dialysis bags to local agencies and special projects over the years. Last year our members rose to our annual President’s Challenge by donating 37 quilts to the national Quilts of Valour program. There wasn’t a dry eye as Jan Easton (second from left) received our quilts on behalf of the program and read us some letters of thanks from veterans who were previous QOV recipients.


 (L to R: Gillian Isnor-McVeigh, Jan Easton, Frances Westgarth, Leslie Quinn)

Early this year we held a members’ workshop to make a cheerful double and single quilt for a Syrian refugee family who were delighted to find them on their beds when they arrived, along with two other beautiful quilts created by individual members. It touched our hearts when the matriarch of this family bravely and shyly attended one of our meetings to express her thanks through one of the “Mariposans 4 Refugees” (M4R) sponsors who accompanied her.


Made by Brenda Stride

Made by Marilyn Lippert


This year is the 90th anniversay of the Legion, and in answer to their request for a raffle quilt, guild members recently provided not one but seven! They were gratefully received by Jack Hird, Branch 34’s Second Vice President and will be raffled throughout the year to raise funds for Branch projects and the national Homeless Veterans’ fund which supports homeless or nearly homeless vets, many of whom suffer from PTSD.
L to R: Nikki Watt, Jack Hird, Pat Hill 


L to R: Heather Smith, Jack Hird, Loretta Hughes 


L to R: Barb Archer, Jack Hird, Jeanne Wallace

Guest speakers are always a highlight at our meetings, and so far this year alone we’ve had the pleasure of learning about new products (Sue Polera from Thimbles and Things, owner of our wonderful local quilt shop), stained glass quilts (Joni Newman), scrappy stash busting (Kay Hanna and Elaine Theriault), the history of quilting in Canada (Pauline Grondin), landscape quilts (Pat Reynolds), a quilter’s personal journey (Noshi Gulati), threads and needles (Anita Zobens of The Cotton Mill Threadworks). As well, both Joni Newman and Pat Reynolds held inspiring workshops for participating members.

Our “Sunshine Quilt Show” (yes, that’s Leacock’s influence) was held in April and as many of you know it is an undertaking requiring long-range planning and dedicated guild volunteers committed to working hard. However, partnered with the smaller Evening Threads Guild, it was a labour of love and we had no shortage of guild members willing to do their part. One of the features of our show was a display of 14 amazing entries and 3 Viewer’s Choice winners of a Co-Presidents’ Challenge, entitled ‘Picasso-“Good artists copy…” ‘.


L to Rt: 3rd Judy Dagenais, 2nd Sandy McFadden, 1st Shelley Houser

In addition, Viewer’s Choice winners of the Sunshine Quilt Show included Brenda Stride, seen wearing her appliqué jacket and Sandy McFadden, posing beside her elephant wallhanging.


As you can see, our guild has many talented quilters and Nikki Watt, winner of the CQA/ACC ribbon at our show, is certainly no exception. Her hand appliqué won the admiration of many!


This spring a busload of guild members attended Quilt Canada 2016 in Toronto, a fun and inspiring experience for all participants. 
Upcoming events in 2017 include Quilt Canada in Toronto, and participation in CQA/ACC’s Big Quilt Bee. We can’t wait!

Saturday, 5 November 2016

Paper Piecing – A Galaxy Full of Perfect Points

Thank you Coats & Clark for being a guest blogger and an amazing sponsor to CQA/ACC!


About our author:
Annette Millard is passionate about sewing and has worked in the sewing industry for many years. She is always happiest with needle, fabric and thread in her hands! She currently enjoys supporting the Coats & Clark community writing blog posts about products and projects for the Coats Sewing Secrets Blog.


Milky Way Quilt designed by Cheryl A. Adam
Beautiful, satisfying quilting is all about the points. But, those lovely little pieces that should match perfectly don’t always quite make it. I know many of us shudder when we think of Foundation Paper Piecing (FPP), but stay with me through this post. FPP is actually easy, fun and opens up a whole world of intricate piecing you thought you’d never be able to do. I have hints, tips and a video for you along with the gorgeous, free Milky Way Quilt Along from Coats and Clark!

Paper What?
While we’re accustomed to stitching fabric, most of us don’t use paper in our quilting. Until today, that is! In Foundation Paper Piecing, you’ll be creating perfect points by stitching fabric directly to a printed foundation paper template. The paper stays with your blocks until you stitch them together and then it’s removed. Intermediate quilters – prepare to be amazed!


Coats Paper Piecing Thread

Special Thread for a Magical Technique

Magical techniques call for great tools, so Coats Paper Piecing Thread is specifically designed to be just what you need. It’s a very fine, yet wonderfully strong Polyester thread that is perfect for reducing bulk in the fine points you’ll be creating. Put aside your stash of “regular” thread, head for the store and choose spools of Coats Dual Duty XP Paper Piecing thread.

When it’s time to remove your foundation paper, you don’t want your stitches ripping and pulling. This is the first place you’ll be glad you chose Coats Paper Piecing Thread! Combined with a shorter stitch length (about 1.5mm) and a size 80 Microtex needle, this strong, fine thread will keep those stitches right where they belong on your amazing block. And, once you’re ready to press and see how well your points fit and lay flat together, you’ll truly be grateful for the fine weight of Coats Paper Piecing Thread. Click here to learn more about this marvelous, specialized thread.


Milky Way Quilt Block One

Piece-ful Paper

The Milky Way Quilt Along Wall Hanging is created with Free Spirit’s beautiful Designer Essential Solids fabrics. But, what about the paper? You’ll be pleased to know that you won’t need anything special. Regular, inexpensive printer paper will work quite well! You may want to explore other paper options, too. Your local fabric store will have special Foundation Paper Piecing Papers and Freezer Papers that are made just for the technique. Whatever you choose, be sure it can be used in your home or copy store printer. Tracing paper may seem like a good idea, but printers will spit, growl and cease to print if you try use a paper that wasn’t designed for printing.


Sample Template (Visual only, download pattern for actual template)

So, you’ve chosen your fabrics, purchased Coats Paper Piecing Thread, settled on a paper and now it’s time to print and piece. The Milky Way Quilt PDFs include the Foundation Template on the last one to two pages of each block’s instructions. They’re designed to print on standard size printer paper so you can easily use what you already have at home. You’ll print four templates from each PDF to create a whole block template. Be sure to read through the printing instructions for Milky Way or any other Foundation Block you print. Your printer set-up makes a big difference and you’ll want to be sure you’re printing the template at the correct size.


Milky Way Quilt Block Two

Cut, Piece, Stitch and Smile

For standard quilt piecing, we steady our hands, take a deep breath and cut precise pieces so they will match perfectly. When you’re Foundation Paper Piecing, your fabrics will be cut in pieces large enough to cover the numbered sections on your printed paper foundation, but they don’t have to be precise. The Milky Way Quilt Along instructions suggest that you “roughly” cut your fabric pieces at least 1.27 cm larger than each section of the foundation template. And this, quilter friends, is one of the wonderful things about FPP – no precise cutting!


Fabric Cutting - from Sew Very Easy video

As you cut your fabric pieces, lay them on the blank side of the paper template and head for a nearby light source. Hold the paper up to the bright light to make sure your cut fabric is amply overlapping the template section. In Laura Ann Coia’s video she suggests printing a template you can cut apart and use as a cutting pattern. You’ll cut and sew your fabric pieces in number order beginning with sections one and two. Once those are cut it’s time to stitch from the printed side, following the line on the paper template.


Placing Fabric Pieces – from Sew Very Easy video

After stitching, you’ll trim the seam allowance to approximately a .635 cm seam allowance on “inside” pieces. It does not need to be a precisely trimmed seam allowance since it’s already stitched! But, the outer edges will be stitched to another block, so you’ll want an exact .635 cm seam allowance on all outside block edges to avoid assembly frustration.


Sew Very Easy Paper Piecing Video

Extra Help From a Trusted Quilting Friend

The Milky Way instructions are detailed and easy to understand. Follow them and they will be your FPP BFF – Foundation Paper Piecing Best Friend Forever! So you can see the steps in ‘live action”, Coats has also partnered with the super-fabulous Laura Ann Coia of Sew Very Easy for informational videos. There will be a companion video for each block! Click here to view Laura Ann’s first video, then be sure to subscribe so you won’t miss any of the series.


Milky Way Quilt Blocks in Sequence

Infinite Points and Beyond!

And now . . . you’re ready to soar off into quilting hyper-space with Coats Milky Way Quilt Along! Click here to learn about the Quilt Along and follow along with the block posts. Be sure to download the General Instructions and read them, too. The finished wall hanging size quilt consists of five blocks. Just perfect for a low-stress, first Paper Piecing Project!
Give Foundation Paper Piecing a try and have fun with it! The Milky Way Quilt Along is a great place to start and you can post your finished Milky Way blocks on the Make it Coats Facebook page or other social media sites- tag #CoatsQuiltAlong. It’s a terrific way to share your quilting joy and see what quilters from all over are doing, too. Coats and Clark will be there for you, so feel free to ask questions on the Sewing Secrets blog along the way. If you need a little extra confidence, click here to view another helpful Paper Piecing video from All People Quilt. There’s a whole new galaxy of perfect points and fabulous piecing open to you now – enjoy!